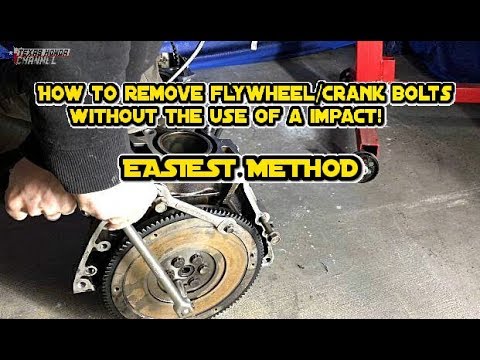
If you don’t have an impact wrench, you can remove a flywheel nut by using a breaker bar and a cheater pipe. First, loosen the nut with the breaker bar. Then, place the cheater pipe over the end of the breaker bar to give you more leverage.
With the cheater pipe in place, finish loosening the nut and remove it by hand.
- Using a wrench, loosen the flywheel nut until it is finger-tight
- Using an impact wrench, remove the flywheel nut by turning it counterclockwise
- If you do not have an impact wrench, you can use a ratchet and socket to remove the nut
- Remove the washer from the crankshaft
- Slide the flywheel off of the crankshaft

Credit: www.rx7club.com
How Do You Remove a Flywheel Without a Tool?
There are a few ways to remove a flywheel without a tool. One way is to use a flat head screwdriver. Another way is to use a putty knife.
And yet another way is to use a hammer and chisel.
What Tool Size Would You Use to Take off a Flywheel Nut?
Assuming you don’t have the luxury of a powered flywheel removal tool, you’ll need to use a socket and ratchet to remove the nut. The size of the socket you’ll need depends on the size of the flywheel nut. Most likely, you’ll need either a 1/2″ or 3/8″ drive socket.
Once you’ve determined which size socket you need, simply attach it to your ratchet and loosen the nut counter-clockwise until it’s loose enough to remove by hand.
How Do I Remove a Tight Flywheel Bolt?
It’s not uncommon for a flywheel bolt to become stuck or stripped over time. If you’re lucky, the bolt will come loose with some elbow grease and a little bit of patience. However, if the bolt is really tight or has been stripped, you may need to resort to other methods to get it off.
One option is to use an impact wrench. This will usually loosen even the most stubborn bolts. Another option is to heat up the bolt with a torch until it expands and becomes easier to turn.
Just be careful not to overheat the surrounding metal as this could damage it.
If all else fails, you may need to drill out the old bolt and replace it with a new one. This should be done by a professional if you’re not comfortable doing it yourself.
Are Flywheel Bolts Reverse Thread?
There are a lot of different types of bolts out there, and it can be tough to keep track of which ones are reverse thread. But when it comes to flywheel bolts, the answer is pretty simple: they’re not reverse thread. Flywheel bolts are just like any other bolt – they have a standard right-hand thread.
So if you’re having trouble getting your flywheel bolts to budge, make sure you’re turning them the right way!
Briggs flywheel Nut Removal Without A Fly Wheel Holder
How to Remove Flywheel Bolts
If you’re like most people, you probably don’t think about your flywheel very often. But if you ever need to remove it, it’s important to know the right way to do it. Here’s a quick guide on how to remove flywheel bolts:
1. First, make sure that your engine is turned off and cooled down. You don’t want to be working with hot engine parts!
2. Next, locate the bolts that hold the flywheel in place.
There are typically four or six of them, depending on your engine type.
3. Using a wrench or socket, loosen each bolt a few turns until they’re all loose. Don’t remove them completely just yet.
4. Now it’s time to remove the bolts completely. Here’s where things can get tricky – some engines have left-hand threading on the bolts (meaning you turn them clockwise to loosen), while others have right-hand threading (meaning you turn them counterclockwise). Be sure to check which type yours has before proceeding!
5 If everything goes according to plan, the flywheel should now be free from the engine block.
How to Remove Flywheel Without Puller
If you’re a do-it-yourself mechanic, you may find yourself in need of removing a flywheel without a puller. While a flywheel puller makes the job much easier, it’s not always necessary. With the right tools and some patience, you can remove a flywheel without a puller.
Here’s what you’ll need:
– A hammer
– A block of wood or something similar to use as a spacer
– A large screwdriver or pry bar
– Lots of patience!
First, locate the center pilot hole in the flywheel.
This is where the crank shaft would normally go through. Next, take your block of wood and place it on top of the pilot hole. You want to make sure that the wood is thick enough so that when you hit it with the hammer, it won’t go all the way through the pilot hole (this could damage your engine).
Once the wood is in place, take your large screwdriver or pry bar and place it on top of the wood. Again, make sure that there is enough space between the tip of the tool and the bottom of the pilot hole so that you don’t damage anything.
Now comes the tricky part.
You need to hit your screwdriver or pry bar with enough force to loosen up the flywheel but not so hard that you break something or send your tool flying acrossthe room! It may take a few tries to get just right but be patient and eventually you’ll loosen up that flywheel.
Flywheel Nut Removal Tool
If you’re a car enthusiast, then you know that one of the most important aspects of car maintenance is removing and replacing your flywheel. And while you can do this by hand, it’s always best to use a flywheel nut removal tool.
There are a few different types of flywheel nut removal tools on the market, but they all essentially work in the same way.
First, you’ll need to remove the old flywheel nut from your car. Then, you’ll need to place the tool over the new flywheel nut and tighten it down. Once it’s tight, you can then remove the tool and install your new flywheel.
It’s important to note that there are two different types of Flywheel Nut Removal Tools: manual and pneumatic. Manual tools are cheaper and easier to use, but they require more effort on your part. Pneumatic tools are more expensive but they’re much easier to use since they do all the work for you.
Whichever type you choose, make sure that it’s compatible with your car model so that you don’t run into any problems during installation.
How to Remove a Flywheel With a Puller
If your flywheel needs to be removed, the first step is to use a flywheel puller. This tool will help to loosen and remove the flywheel from the crankshaft. To use a flywheel puller, first locate the pilot hole in the center of the flywheel.
Next, insert the bolt through the pilot hole and screw on the nut until it is tight. Then, turn the handle of the flywheel puller clockwise to loosen the flywheel. Once loosened, you can remove the flywheel by hand.
Conclusion
This blog post provides clear instructions on how to remove a flywheel nut without an impact wrench. It is well written and easy to follow. This is a great resource for anyone who needs to remove a flywheel nut without an impact wrench.


Leave a Reply