
There are a few different ways that you can reset your solar controller. The most common way is to simply disconnect the battery from the solar controller and then reconnect it after a few seconds. You can also reset your solar controller by pressing and holding the “reset” button for a few seconds.
If you have a digital display on your solar controller, you may also need to press the “menu” button and then use the arrow keys to navigate to the “reset” option.
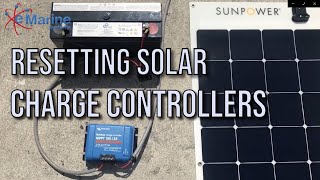
- Locate the solar controller unit
- This is typically mounted on the wall near the solar panels or batteries
- Disconnect the power from the solar controller unit
- This may be a simple matter of unplugging it from an outlet, or it may require disconnecting wires from terminals inside the unit
- Remove the cover from the solar controller unit and locate the reset button inside
- Press and hold the reset button for 5-10 seconds, then release it
- 5a) If there is an LED indicator light on the solar controller, it should now be lit up, indicating that the controller has been reset successfully
- 5b) If there is no LED indicator light, reconnect power to the unit and check for proper operation –the display should show “0” if properly reset
Credit: www.youtube.com
How Do I Reset My Charging Controller?
If your charging controller has a reset button, press and hold the button for 5 seconds. If your controller does not have a reset button, unplug the unit from the power outlet and plug it back in.
How Do You Reset a Solar Regulator?
If your solar regulator has a built-in display, you can usually reset it by pressing and holding the button for 5 seconds. If your regulator doesn’t have a display, you’ll need to find the reset button. This is usually located on the back of the unit near the terminals.
Once you’ve found the reset button, press and hold it for 5 seconds.
Why is My Solar Charge Controller Not Working?
If your solar charge controller is not working, it could be for a number of reasons. The most common reason is that the controller is not getting enough sunlight. This can happen if the panel is not positioned correctly, or if there is something blocking the sun from reaching the panel.
Another possibility is that the batteries are not properly connected to the controller. Make sure that the positive and negative terminals are connected correctly. Finally, check to see if the fuse on the controller has blown.
If so, replace it with a new one.
Does a Solar Controller Have a Fuse?
If your solar controller has a built-in fuse, it will be located on the back of the unit. The size and type of fuse will be listed in the manufacturer’s specifications. If your solar controller does not have a built-in fuse, you will need to purchase one that is compatible with the unit.
The size and type of fuse will be listed in the manufacturer’s specifications.
PWM 30 Controller Hard Reset
Solar Charge Controller Not Turning on
When your solar charge controller isn’t turning on, it can be frustrating trying to figure out why. Here are some possible reasons why your controller might not be working:
1. The most common reason for a solar charge controller not turning on is because there is no sunlight hitting the solar panels.
This could be because it’s nighttime or because the panels are obstructed by something like trees or buildings. If there’s no sunlight, the panels can’t produce electricity to charge the batteries.
2. Another possibility is that the batteries are already fully charged and don’t need any more power from the solar panels.
In this case, the charge controller will shut off automatically to prevent overcharging of the batteries.
3. It’s also possible that there is something wrong with the actual charge controller itself. This could be due to a manufacturing defect or damage that has occurred over time.
If you think this might be the case, you can try troubleshooting by reading the manual or contacting customer support for help.
Solar Charge Controller Settings
As the name suggests, solar charge controllers are devices that help to control the charging of batteries from a photovoltaic array. In simple terms, it ensures that batteries are not overcharged and damaged by regulating the voltage and current coming from the PV array. It also prevents reverse current flow back into the PV array during nighttime.
There are two types of solar charge controllers – MPPT and PWM. Most solar charge controllers on the market today are PWM type. MPPT type is usually more expensive but is more efficient in harvesting power from a PV array, especially when there is a big difference between the PV array voltage and battery voltage.
When choosing a solar charge controller, pay attention to its maximum input voltage and current rating as well as its output voltage and current rating. The former should be higher than or equal to the nominal values of your PV array while the latter should be compatible with your battery type (lead-acid, Li-ion etc.). Also check if the controller has an LCD display which can show you important information such as battery voltage, charging/discharging current etc.
Some higher-end models even have WiFi connectivity for remote monitoring via smartphone app or web browser interface.
Solar Charge Controller No Display
As technology advances, more and more people are beginning to use solar power as an alternative energy source. Solar power is a renewable resource that can be used to generate electricity, heat water, or provide light. One of the most important components of a solar power system is the solar charge controller.
The solar charge controller regulates the flow of electricity from the solar panels to the batteries. A solar charge controller with no display can be used in a variety of applications.
Most importantly, a solar charge controller prevents overcharging of the batteries.
When batteries are overcharged, they can become damaged and may even catch fire. A solar charge controller with no display will have LED indicators that show when the battery is full and needs to be disconnected from the panel. This feature protects both your investment in the batteries and increases their lifespan.
A second function of a solar charge controller is to prevent reverse current flow. This occurs when the sun goes down and there is no longer any photovoltaic (PV) input, but your devices are still pulling current from the batteries causing them to discharge. If left unchecked, this could damage your devices.
A good quality solar charge controller will have features that protect against reverse current flow ensuring your devices are safe while also prolonging battery life.
Solar charge controllers come in a variety of shapes and sizes depending on your application needs so it is important to do your research before making a purchase decision. Some common types include: MPPT (Maximum Power Point Tracking), PWM (Pulse Width Modulation), and buck-boost converters .
It is important to select a reputable brand that offers customer support in case you have questions or problems arise with your system down the road .
Solar Charge Controller Manual
Most solar charge controllers on the market today are automatic, meaning they will automatically regulate the charging process based on the battery’s needs. However, there are still a few manual solar charge controllers available. This type of controller requires the user to manually set the charging parameters based on the battery’s needs.
While this may sound like more work, it can actually be very helpful in getting the most out of your solar panel system.
Manual solar charge controllers can be very helpful in ensuring that your batteries are properly charged. By manually setting the charging parameters, you can ensure that the batteries are not overcharged or damaged by too much power from the sun.
Additionally, manual solar charge controllers can help to prolong the life of your batteries by preventing them from being constantly cycled through different voltage levels.
If you are interested in using a manual solar charge controller, there are a few things to keep in mind. First, make sure that you read and understand the instructions that come with the unit.
Second, always use caution when working with electrical components – if you’re not comfortable doing so, hire an electrician to assist you.
Conclusion
This blog post provides clear instructions on how to reset a solar controller. It is a simple process that can be completed in a few minutes. By following these steps, you can ensure that your solar controller is working properly and efficiently.


Leave a Reply